1.Log into the POS system using an account that has access to the scanner device.
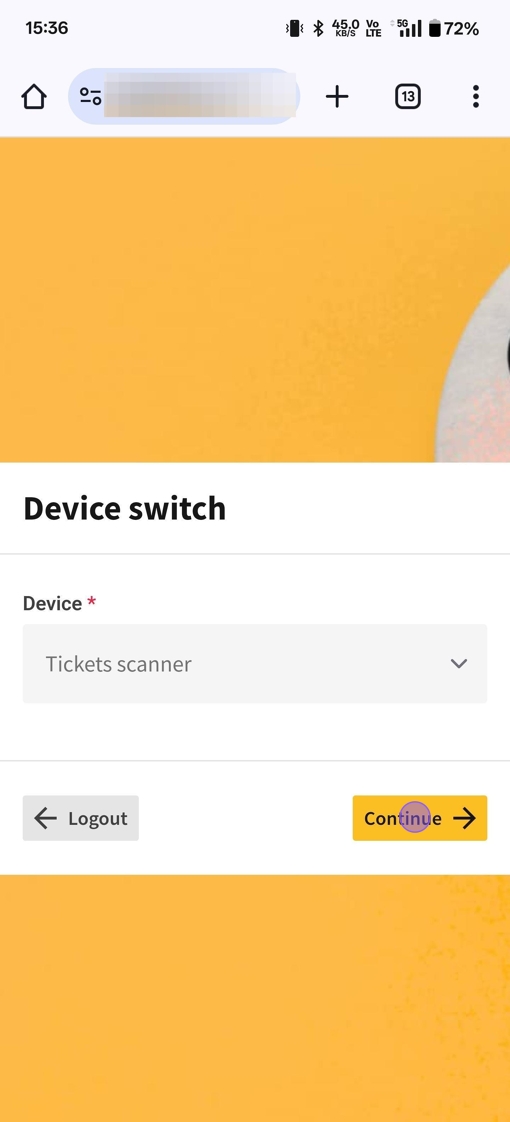
2.Choose the scanner from the device list.
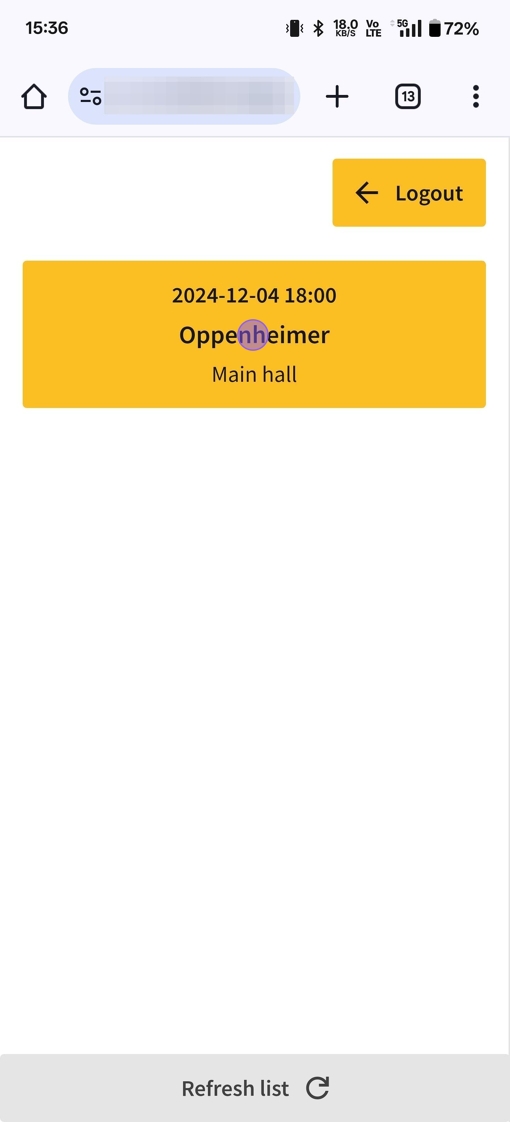
3.You will be directed to the scanner page, where you can select various movies for which you can scan tickets. If you need to refresh the list due to any changes, click on "Refresh List".
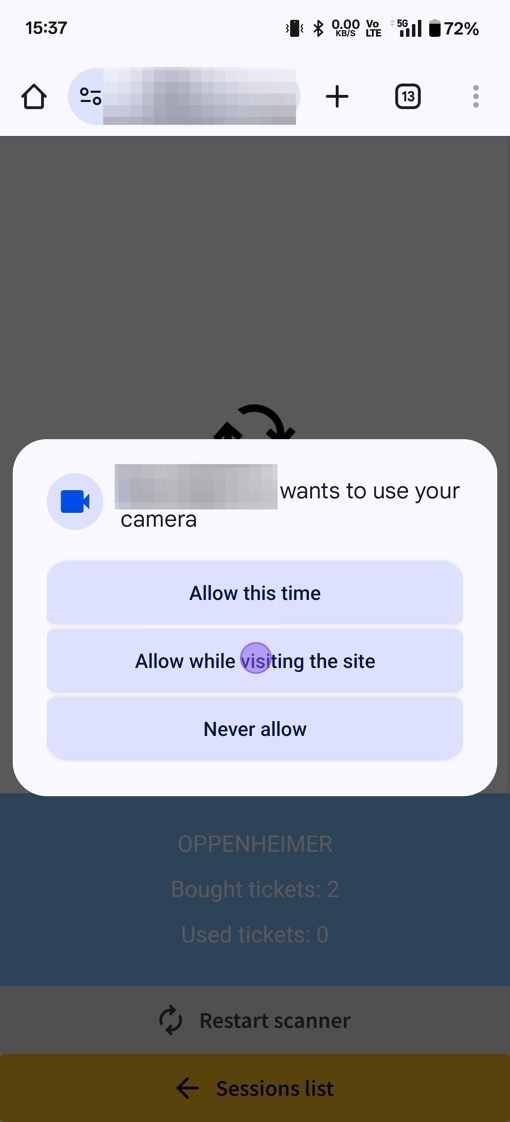
4.The first time you open a movie on your device, you will be prompted to grant the POS access to your camera for ticket scanning. Click on "Allow while visiting the site".
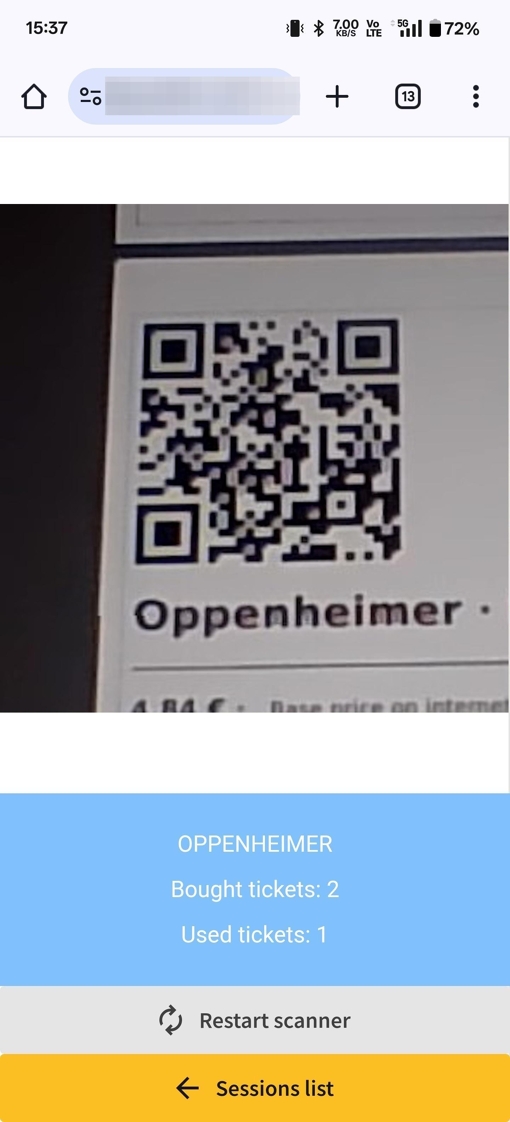
5.You can now scan ticket QR codes using your device's camera. You will receive different messages depending on the QR code scanned. Additionally, at the bottom, there is a section displaying the movie's name, the total number of tickets purchased, and a separate count for tickets that have been scanned.
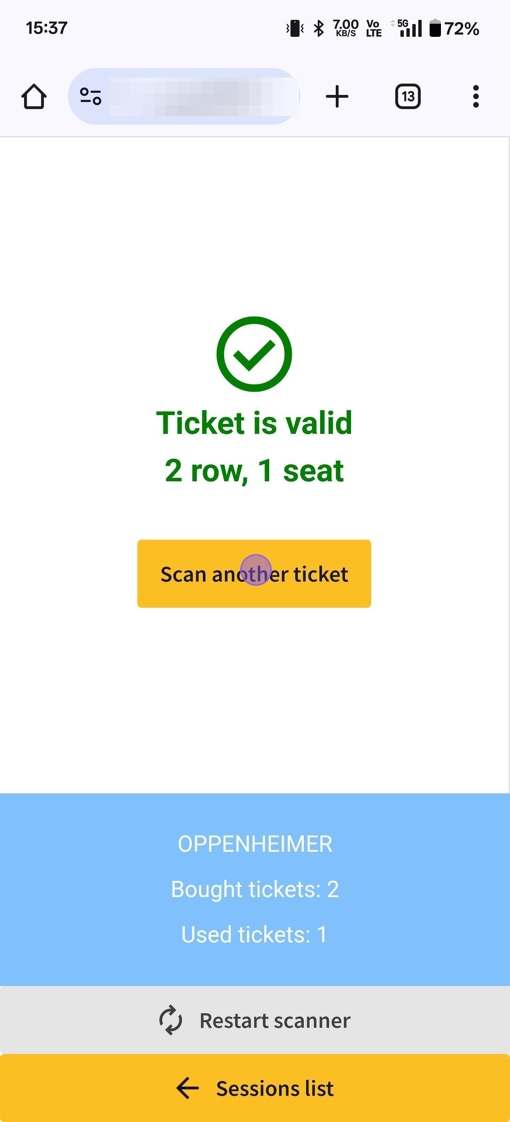
6.If the ticket is valid and corresponds to the correct movie screening, the scanner will confirm its validity and display the associated seat. Click on "Scan another ticket"
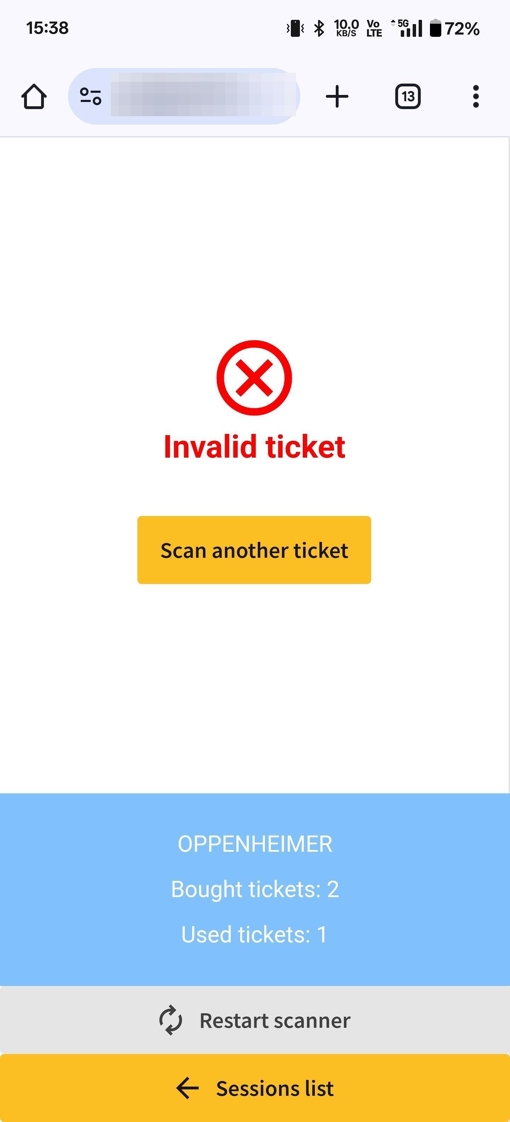
7.If the ticket is for a different screening, the scanner will indicate that it is an invalid ticket.
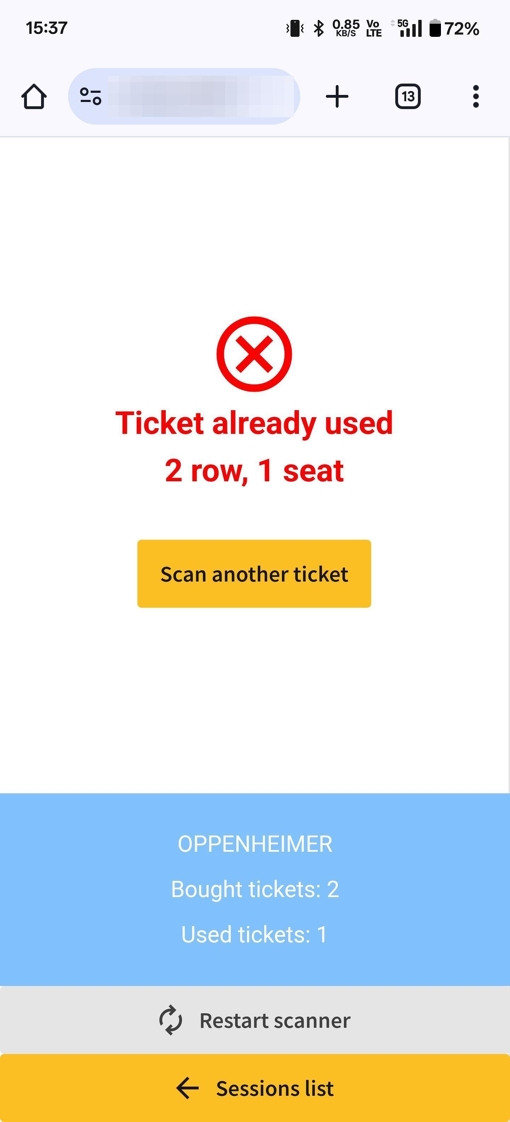
8.If the ticket is for the correct movie screening but has already been scanned, the scanner will inform you that the ticket has already been used and will display the seat information.
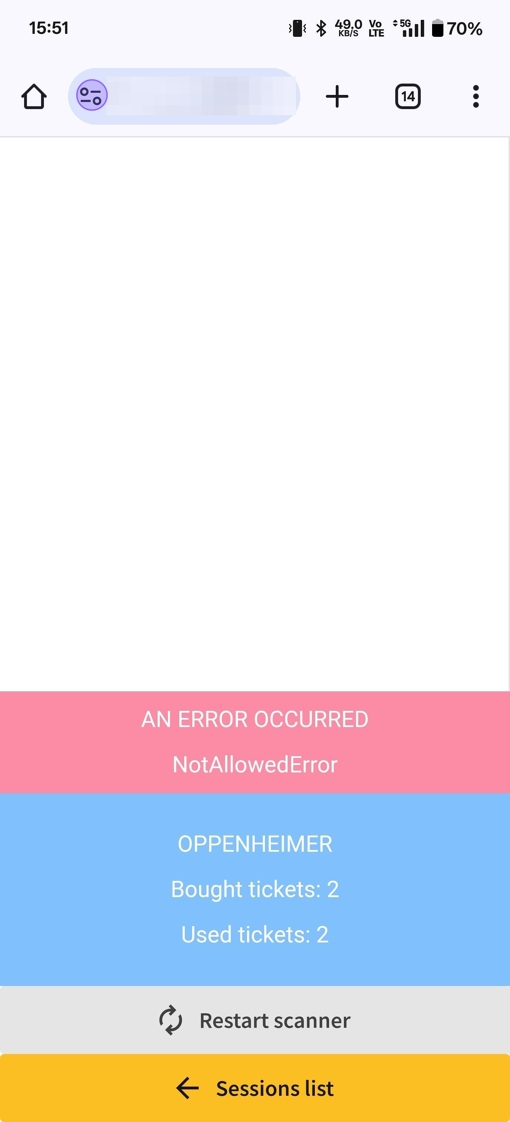
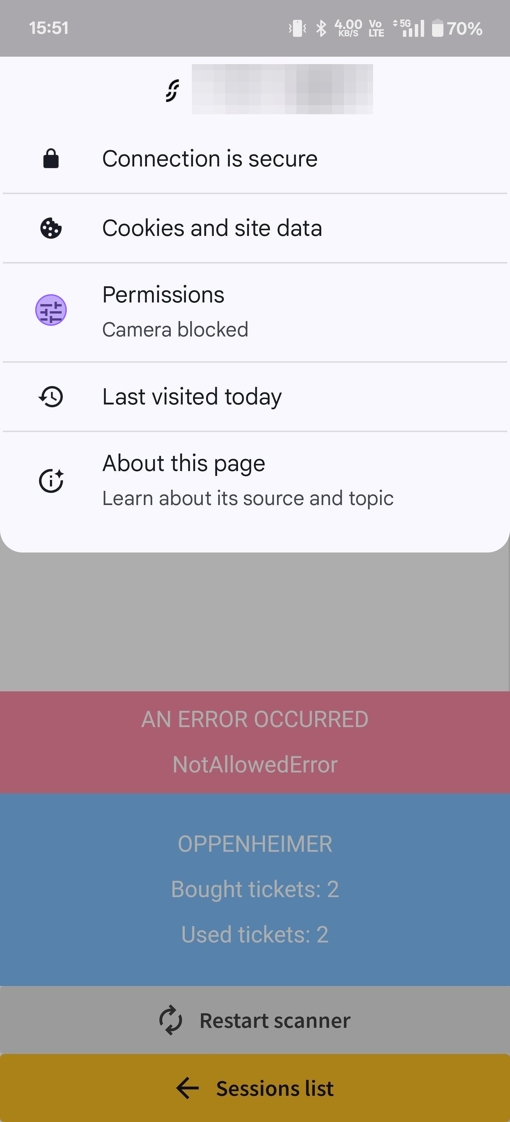
1.If you denied camera permissions in any of the previous steps, you will be unable to scan tickets, and a "NotAllowedError" will appear. To resolve this, you need to unblock and enable camera permissions on the POS site. On mobile devices, click on the settings icon to the left of the POS URL.
2.In the site info menu, locate the permissions tab, which will indicate that camera permissions are blocked. Click on it.
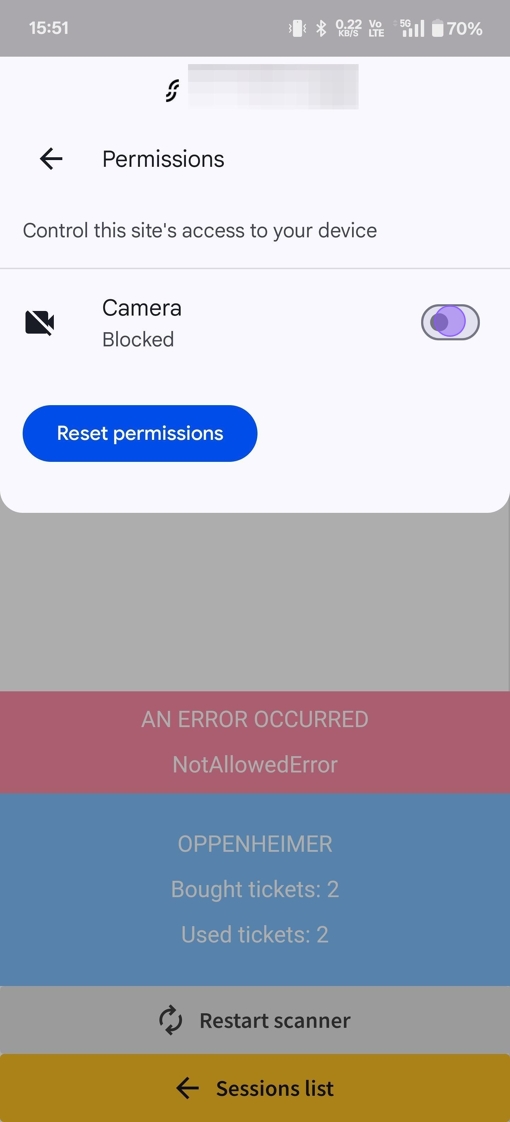
3.On the permissions page, toggle the switch to enable camera permissions for the POS site. Afterward, press the "Restart scanner" button to resume ticket scanning.